Custom MCP in MCP360
MCP360 allows you to create custom MCP tools using either Custom API or Code Execution types. Everything—from API handling to executable logic—runs in a single environment, reducing friction in your daily workflows.
When configured, these MCP tools execute with the required context, enabling faster operations and a more consistent workflow across your custom implementations.
Create Custom MCP
Login into MCP360 dashboard.
Open Project or create new.
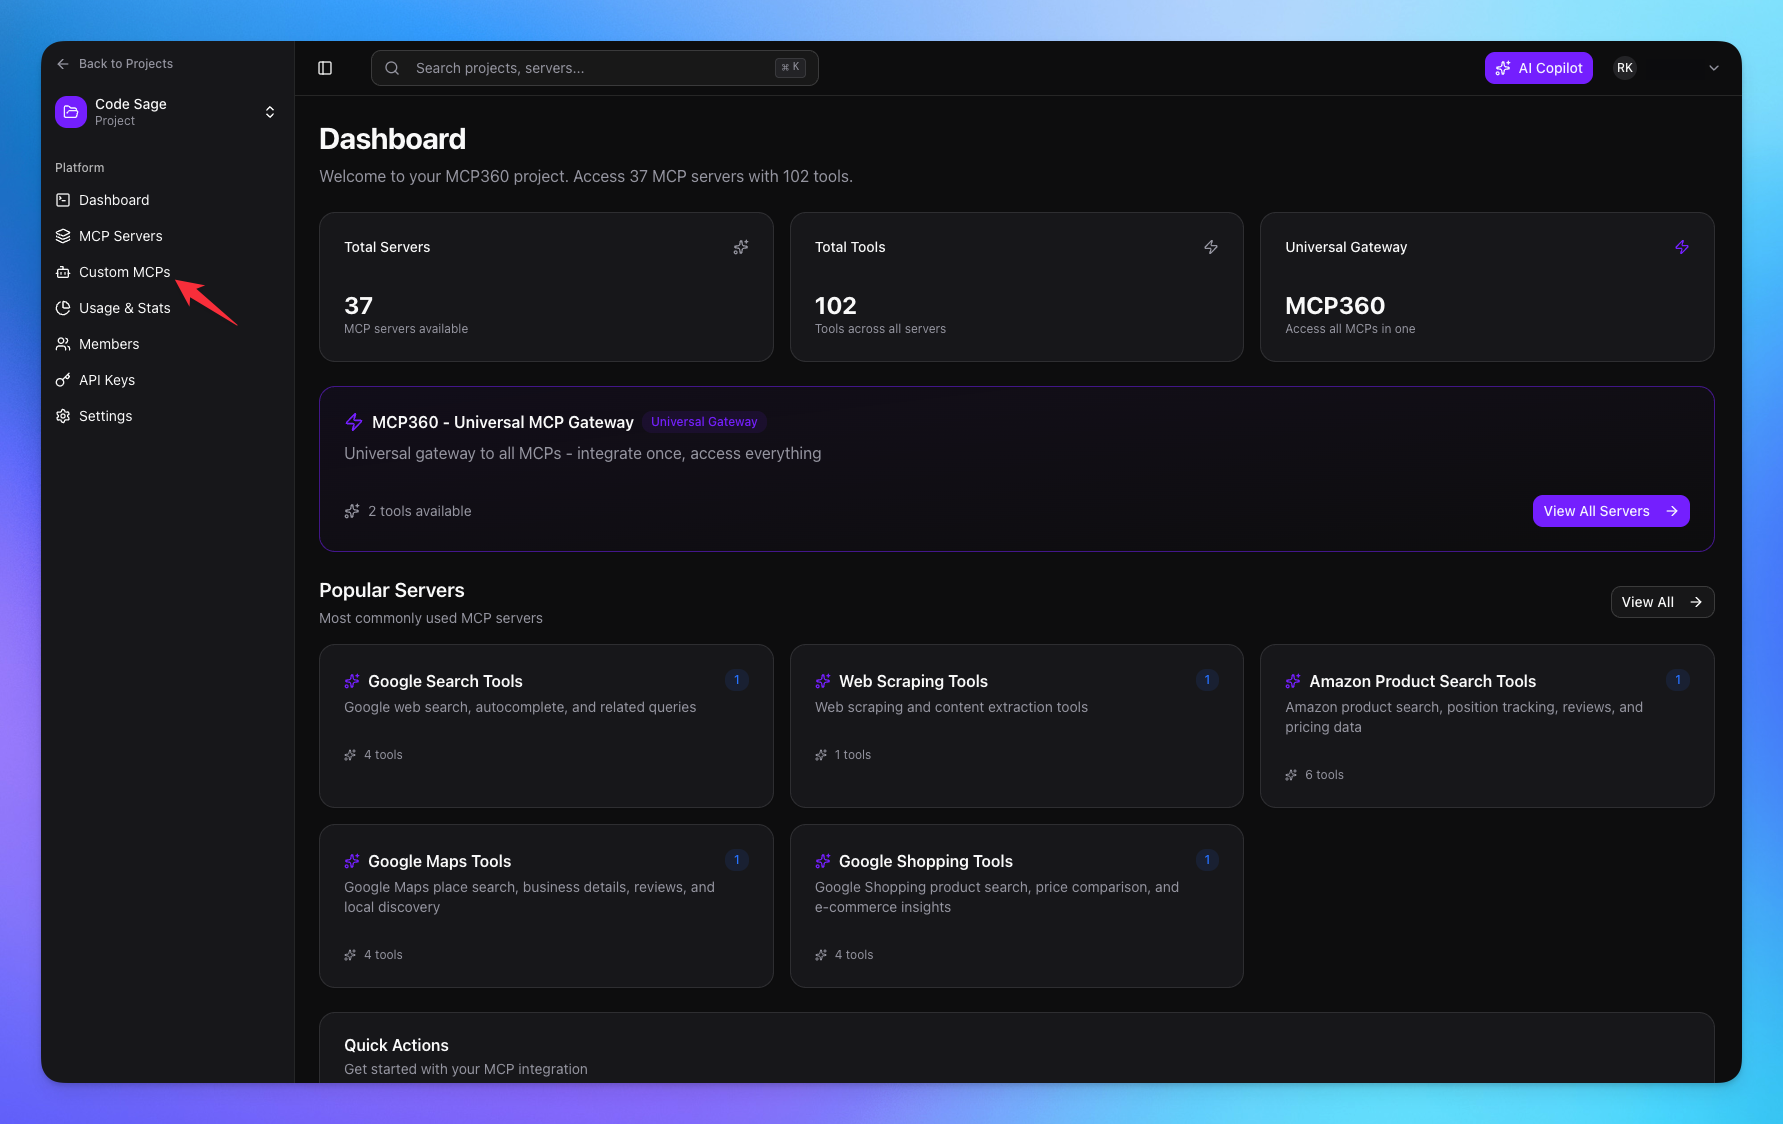
Go to Custom MCP option from Sidebar.
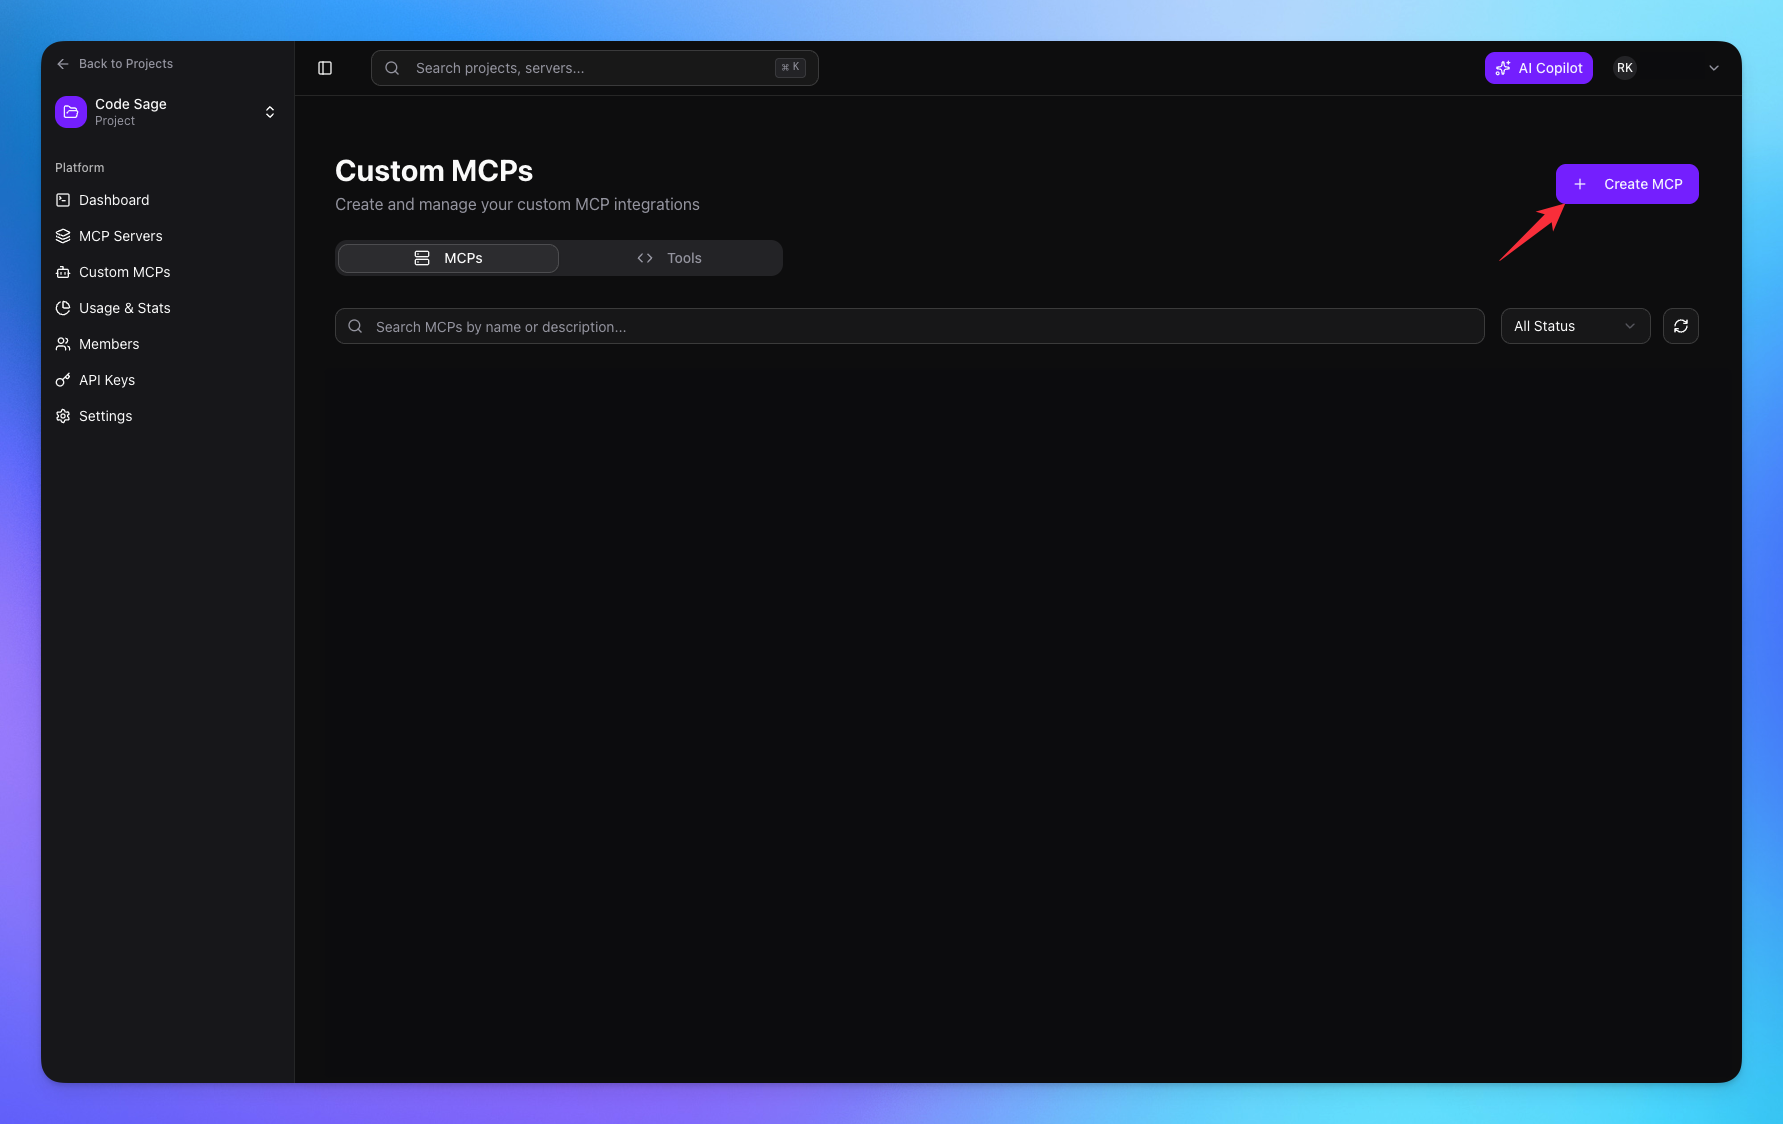
Click on Create MCP button.
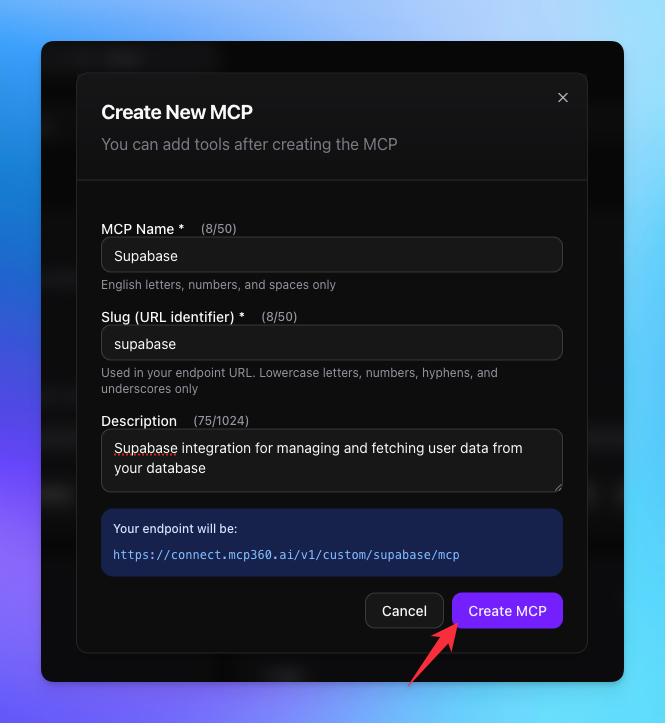
Add the name and description of MCP.
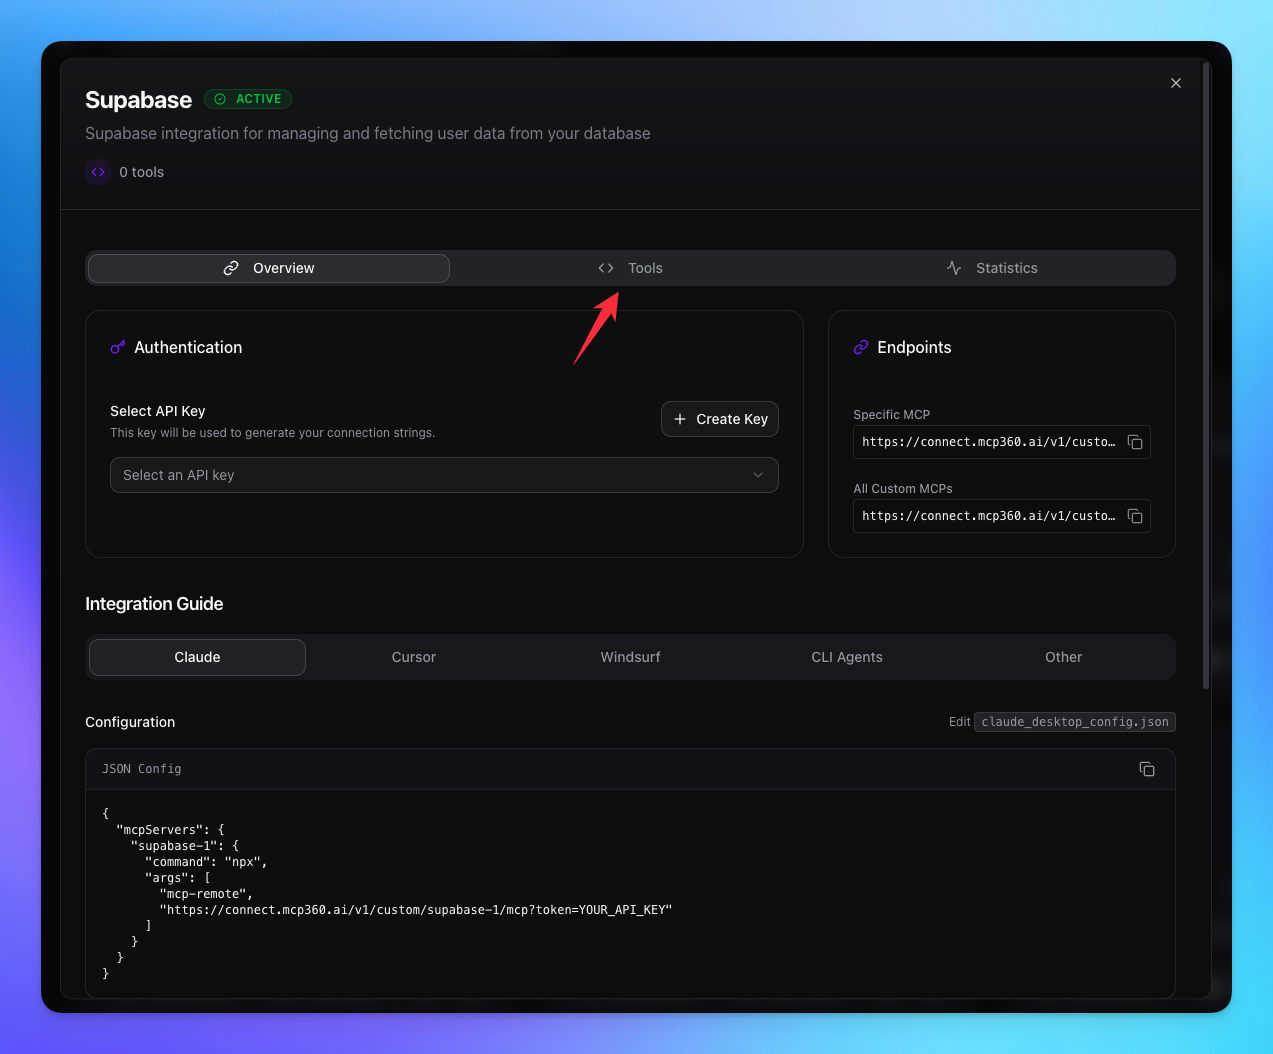
Navigate to Tools page.
Click on Import Tools button.
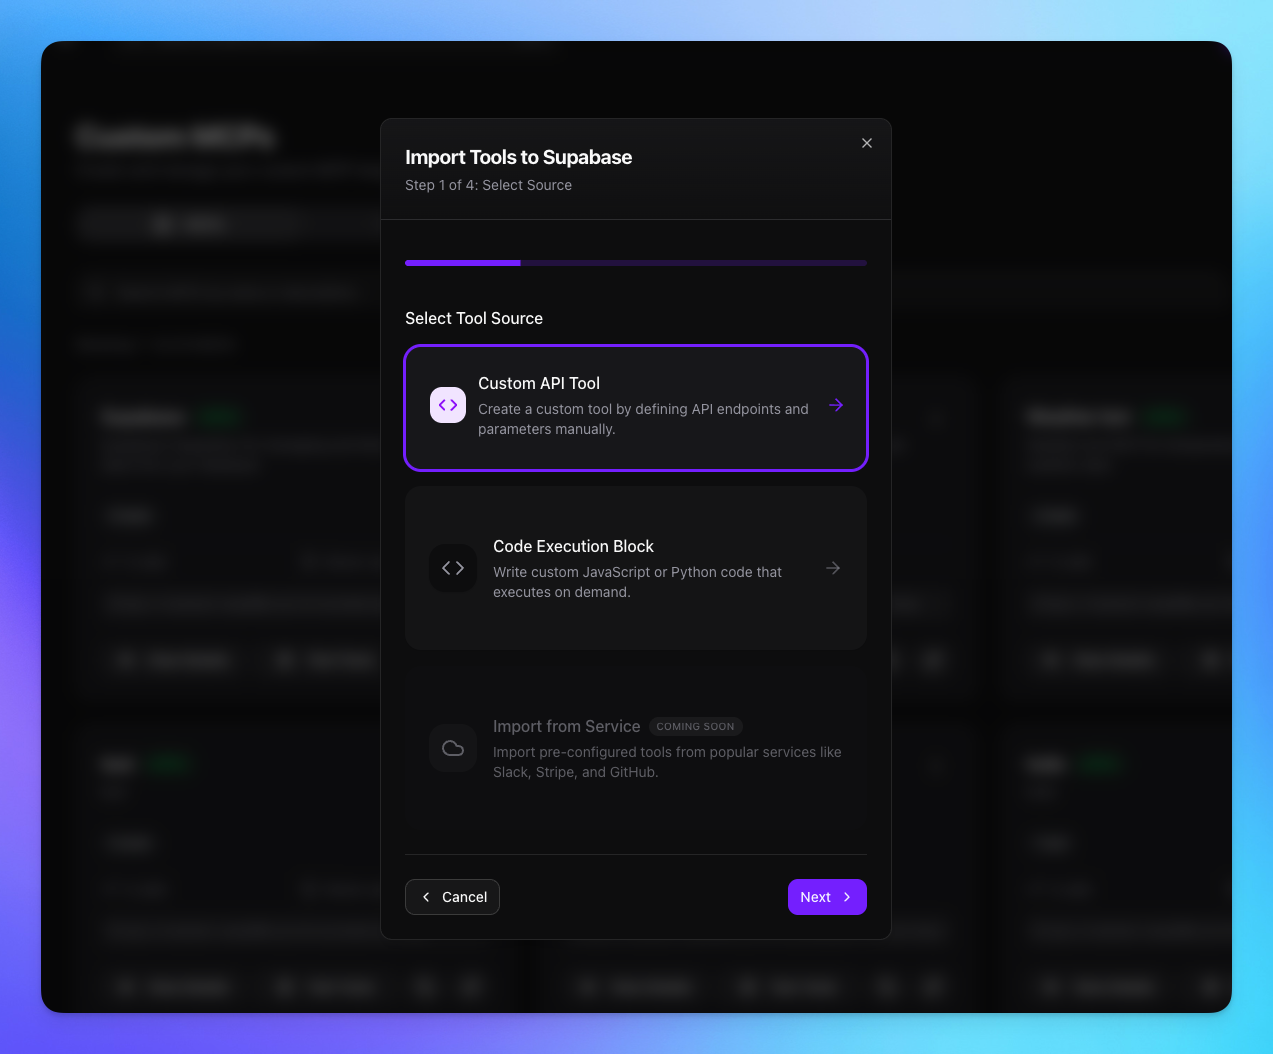
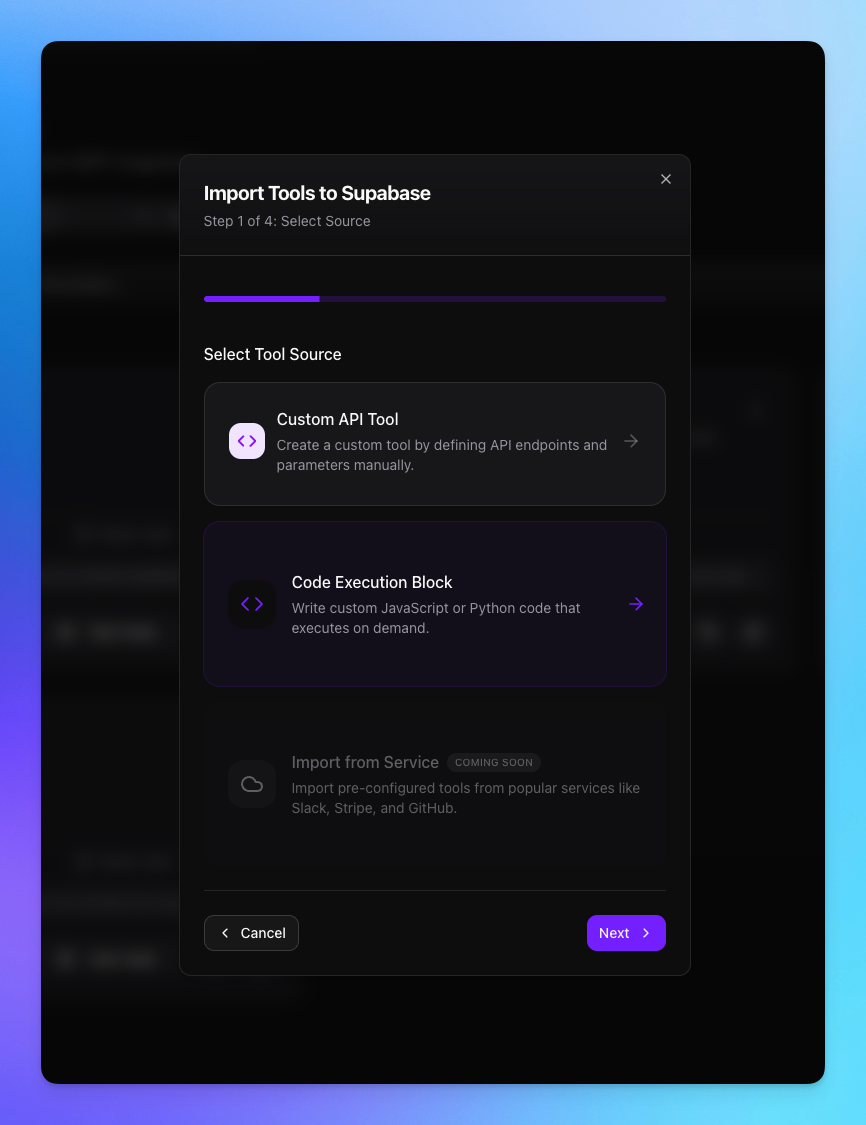
1. Custom API Tool
Click on Custom API Tool option.
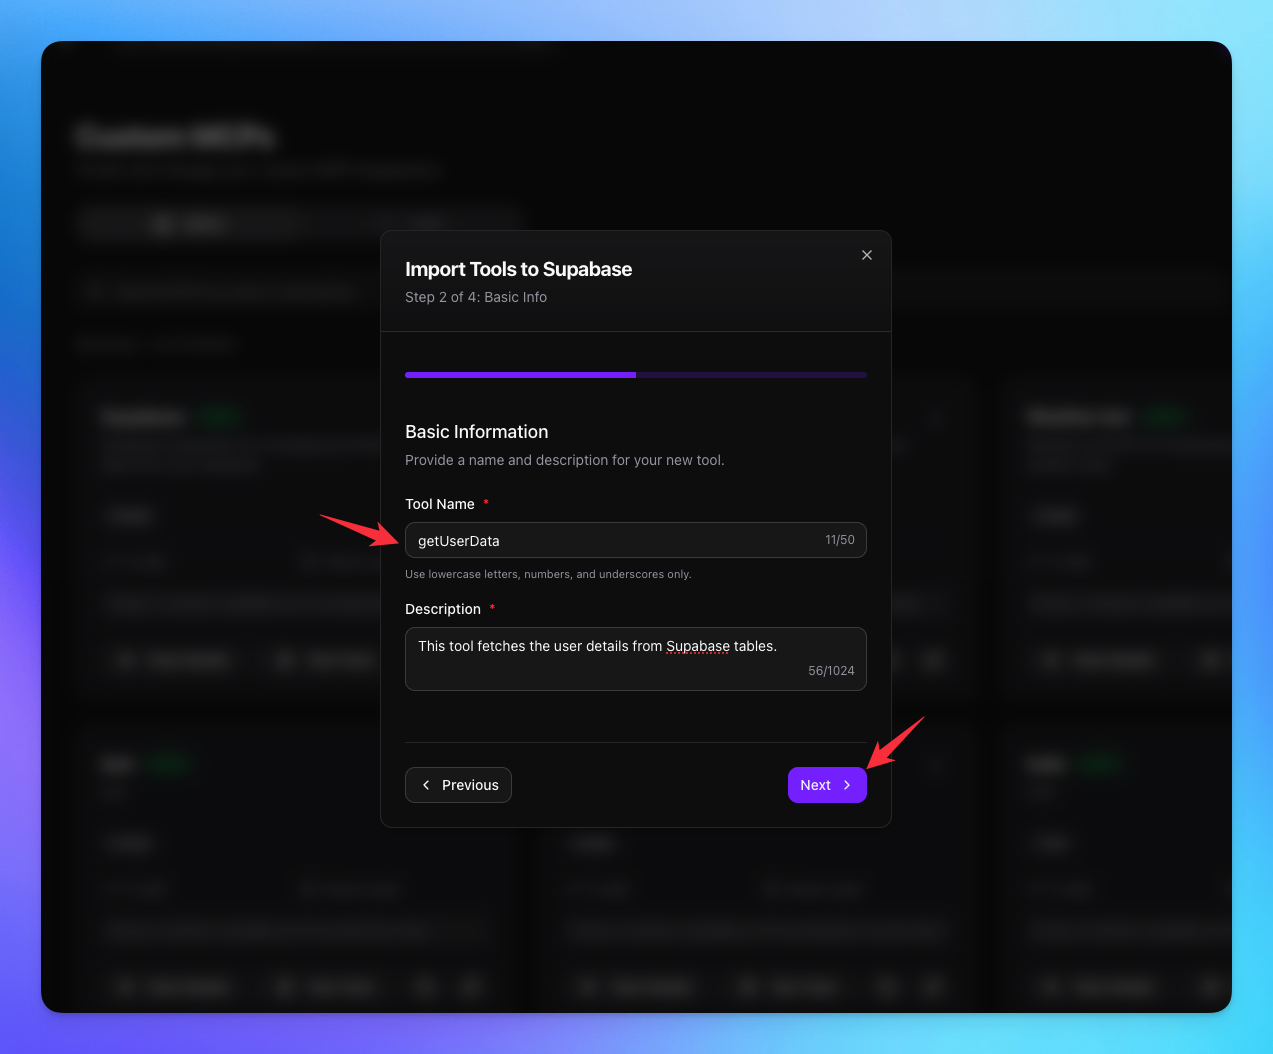
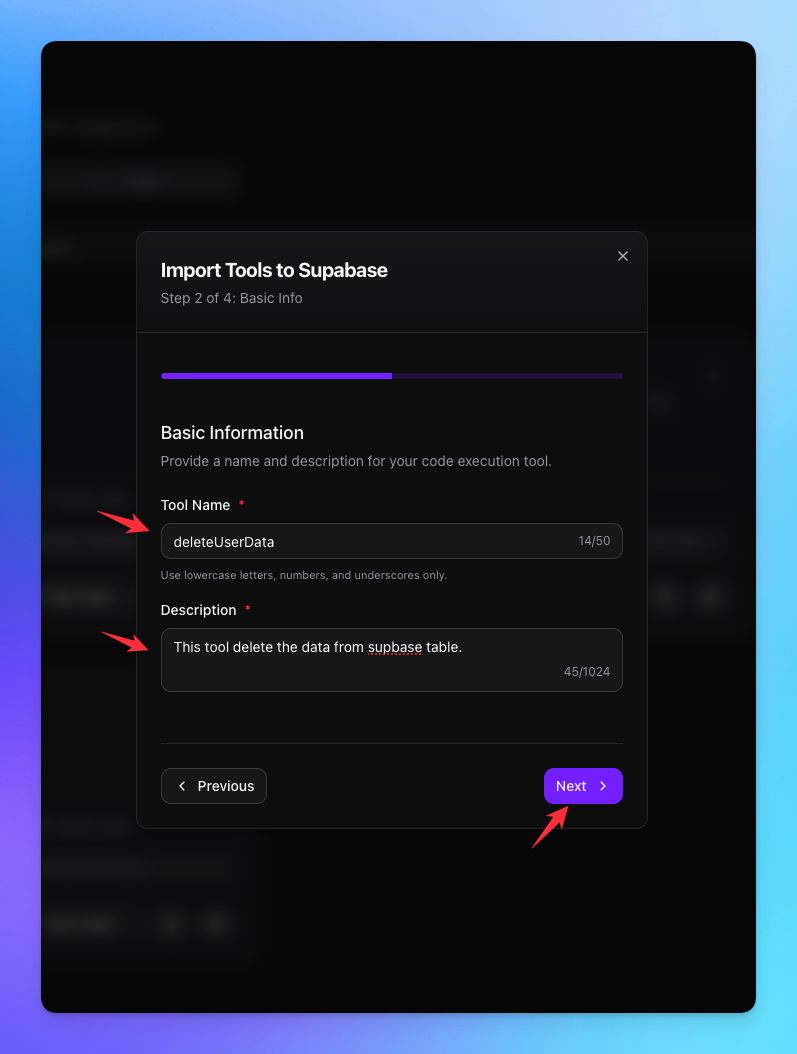
Add the Tool Name & Description.
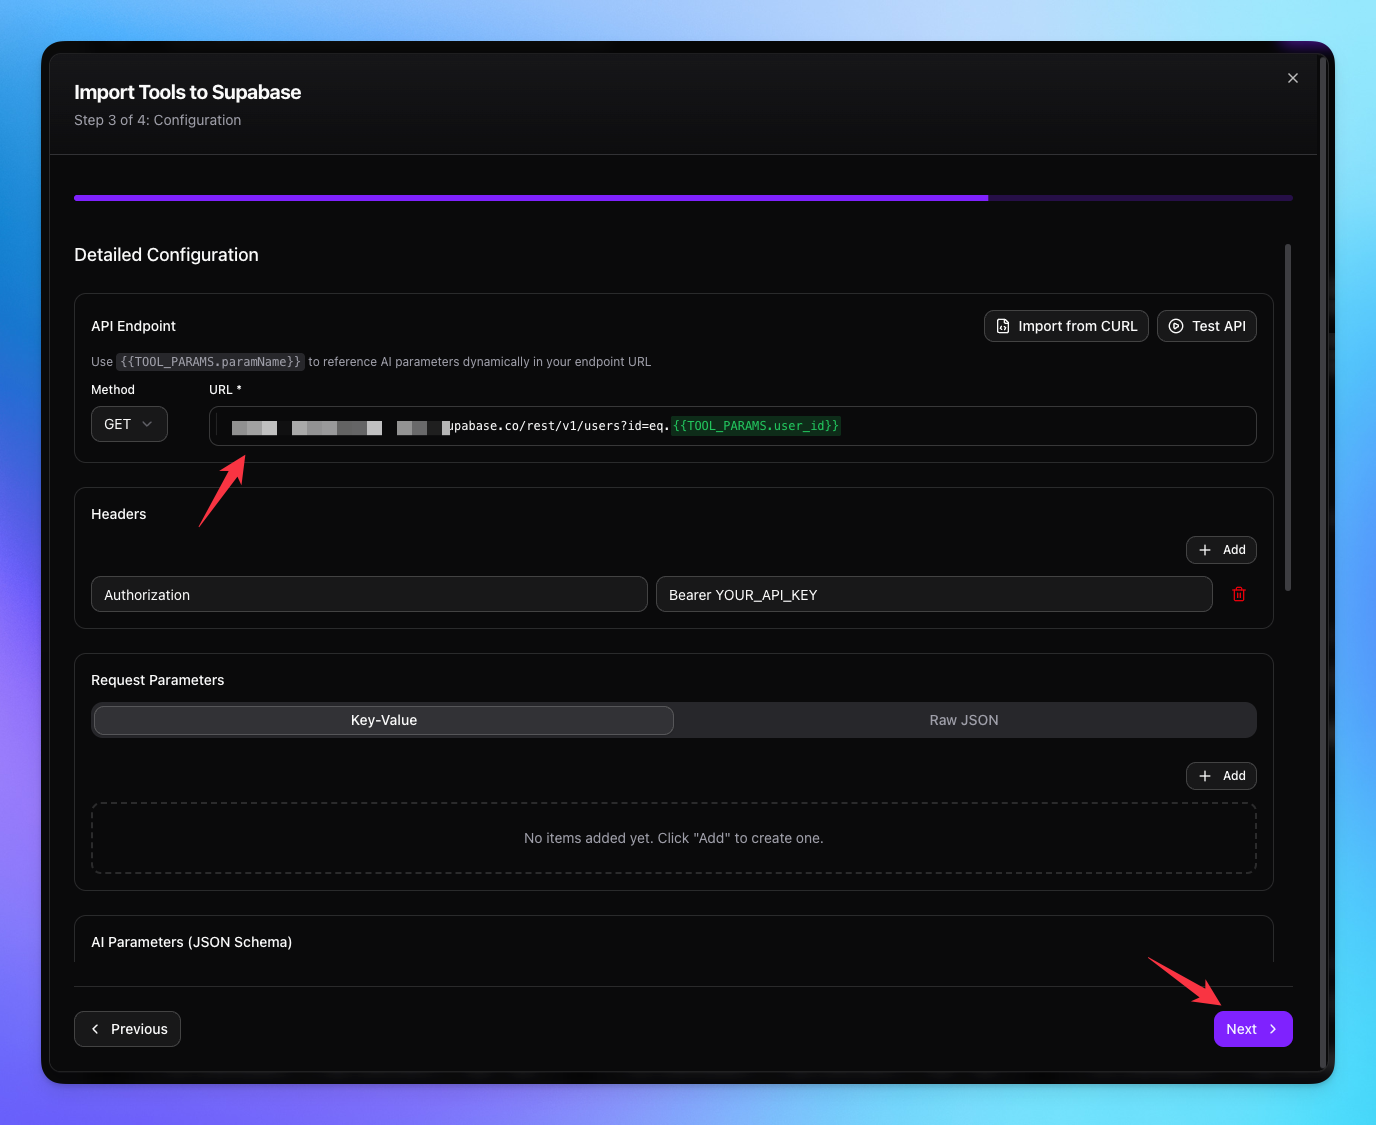
Choose the API method.
Add the Endpoint of api.
Add Headers if any.
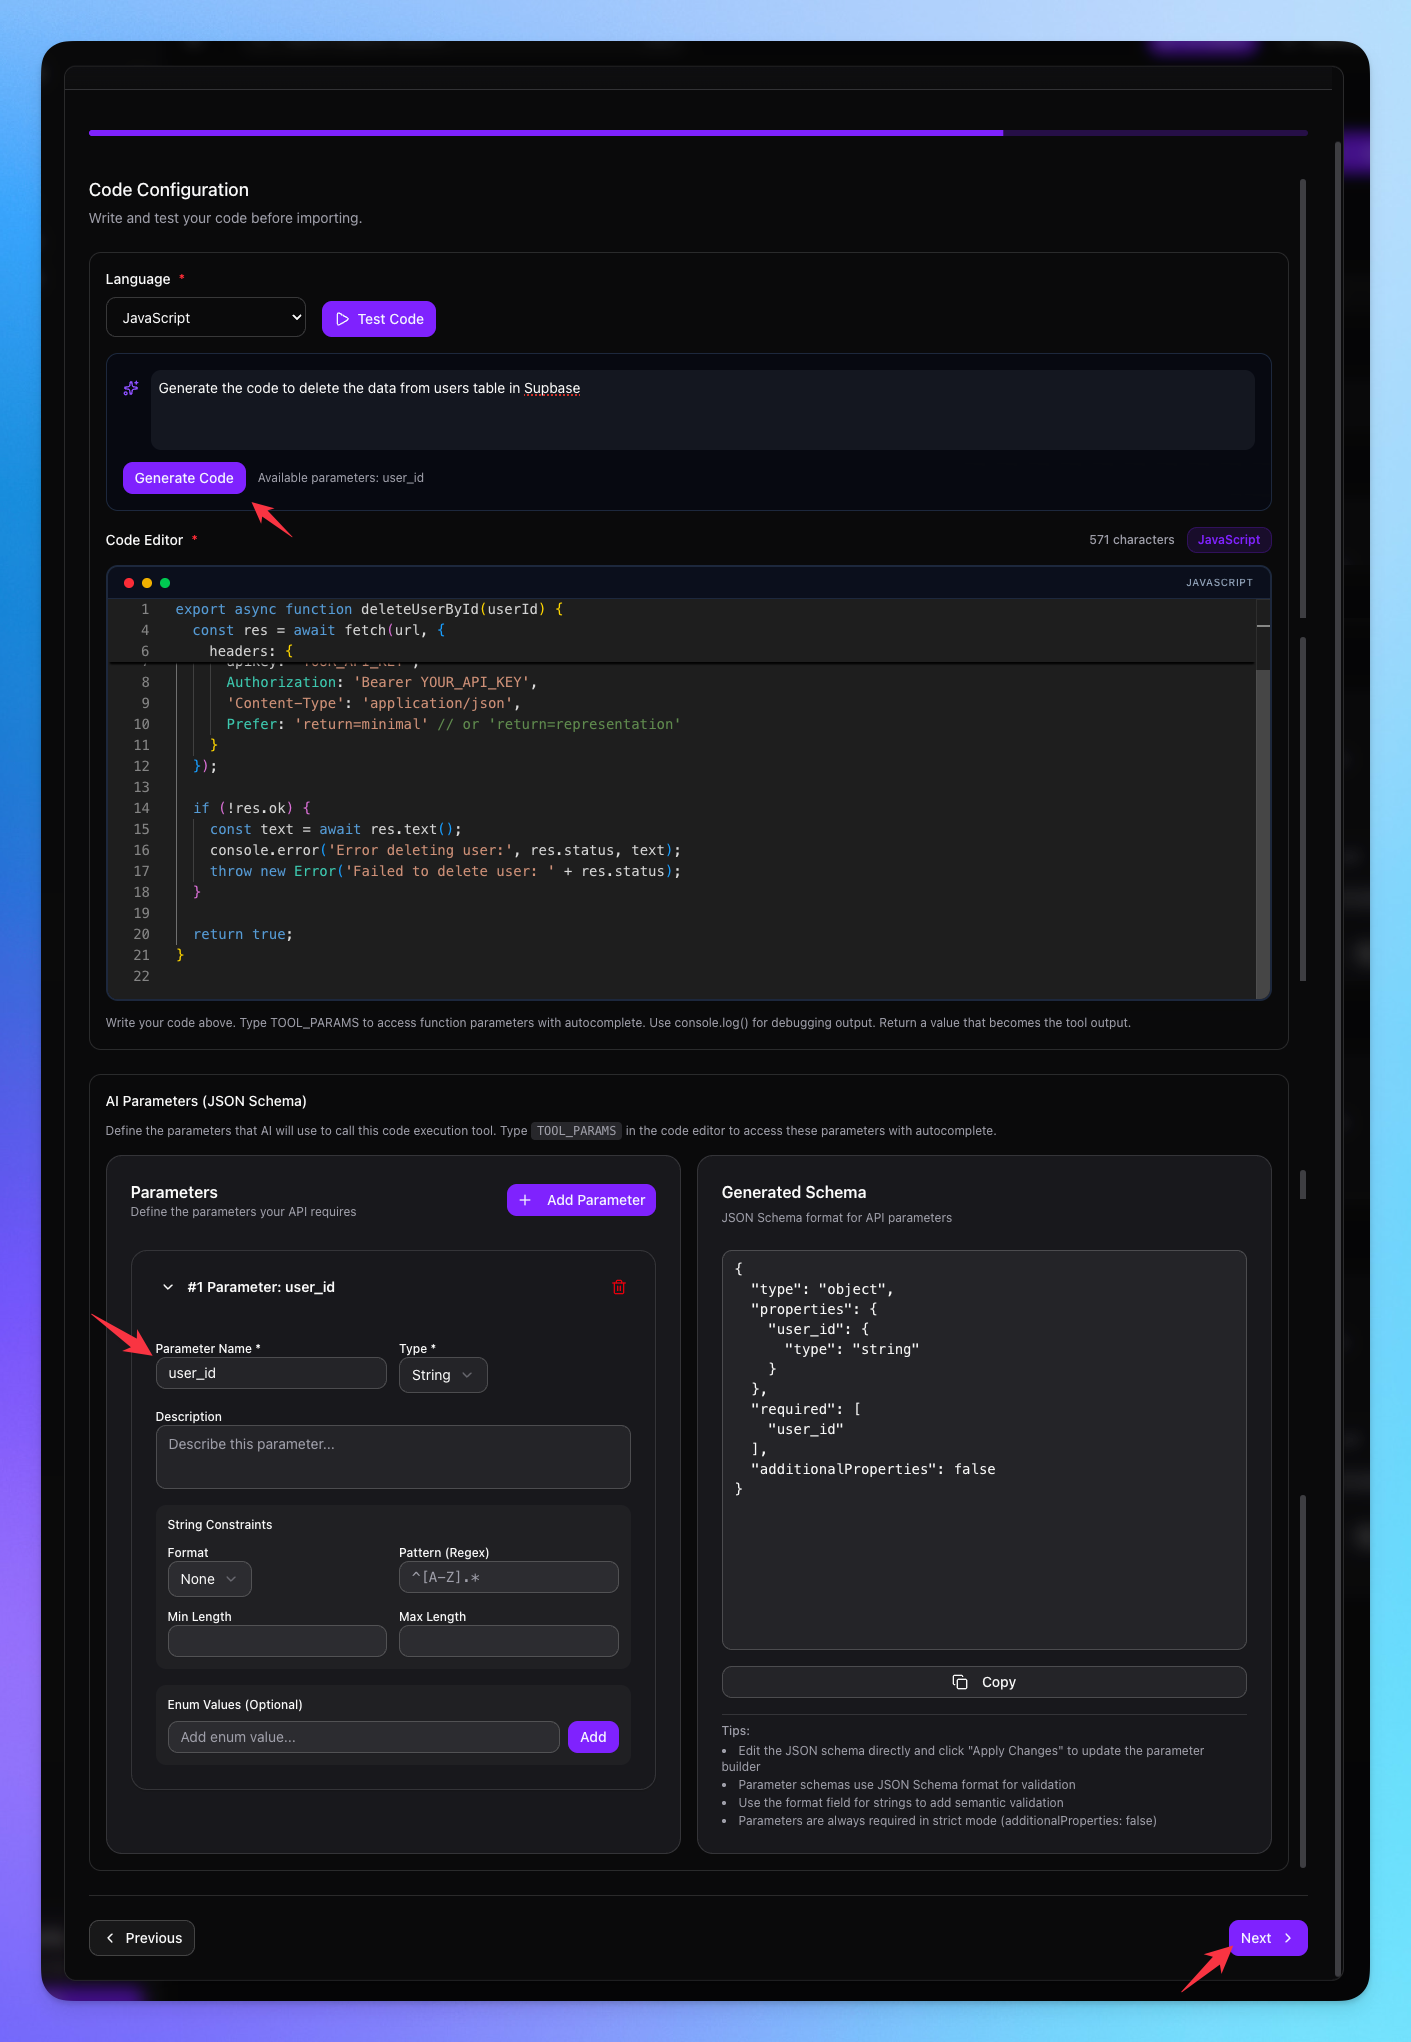
Add AI Parameter for the Dynamic values.
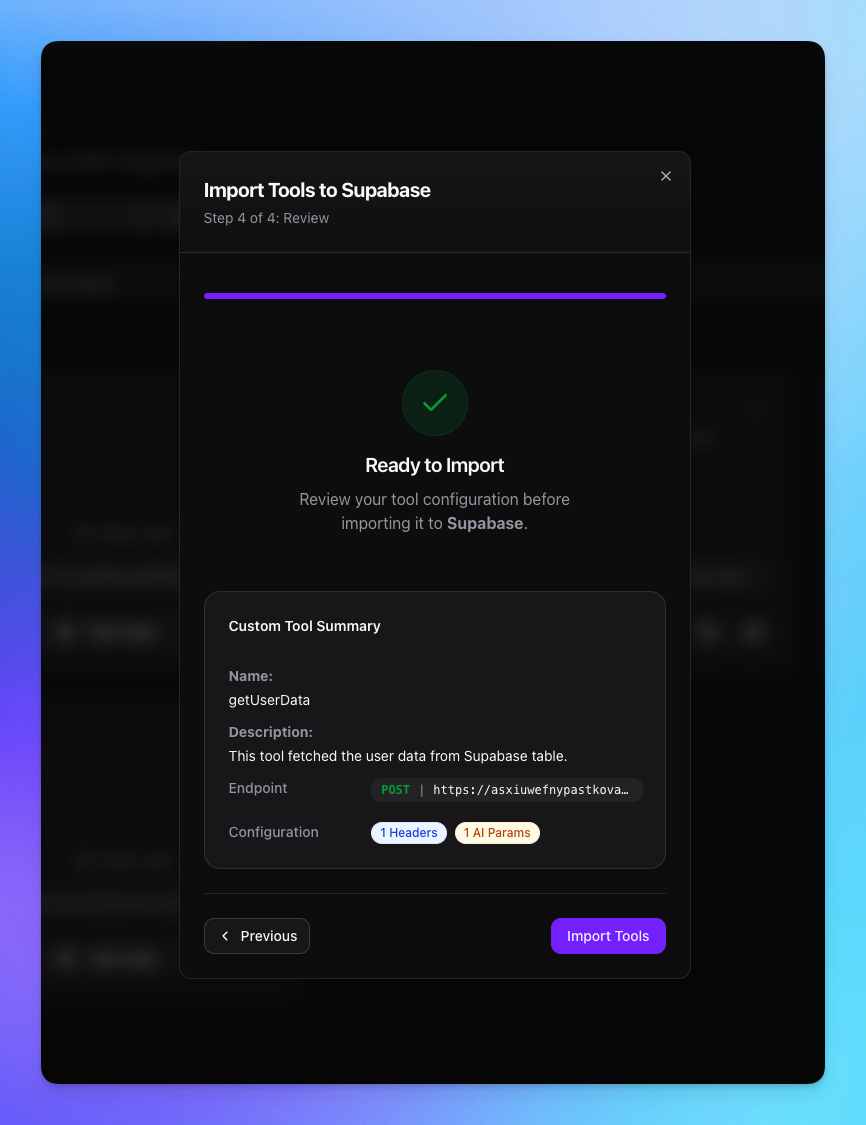
Import the tool.
2. Custom Code Tool
Click on Code Execution Block option.
Add MCP name.
Add MCP Description.
Choose the Language ( Javascript / Python ).
Write or Generate the code with Ask AI feature.
Tools from added from Server.
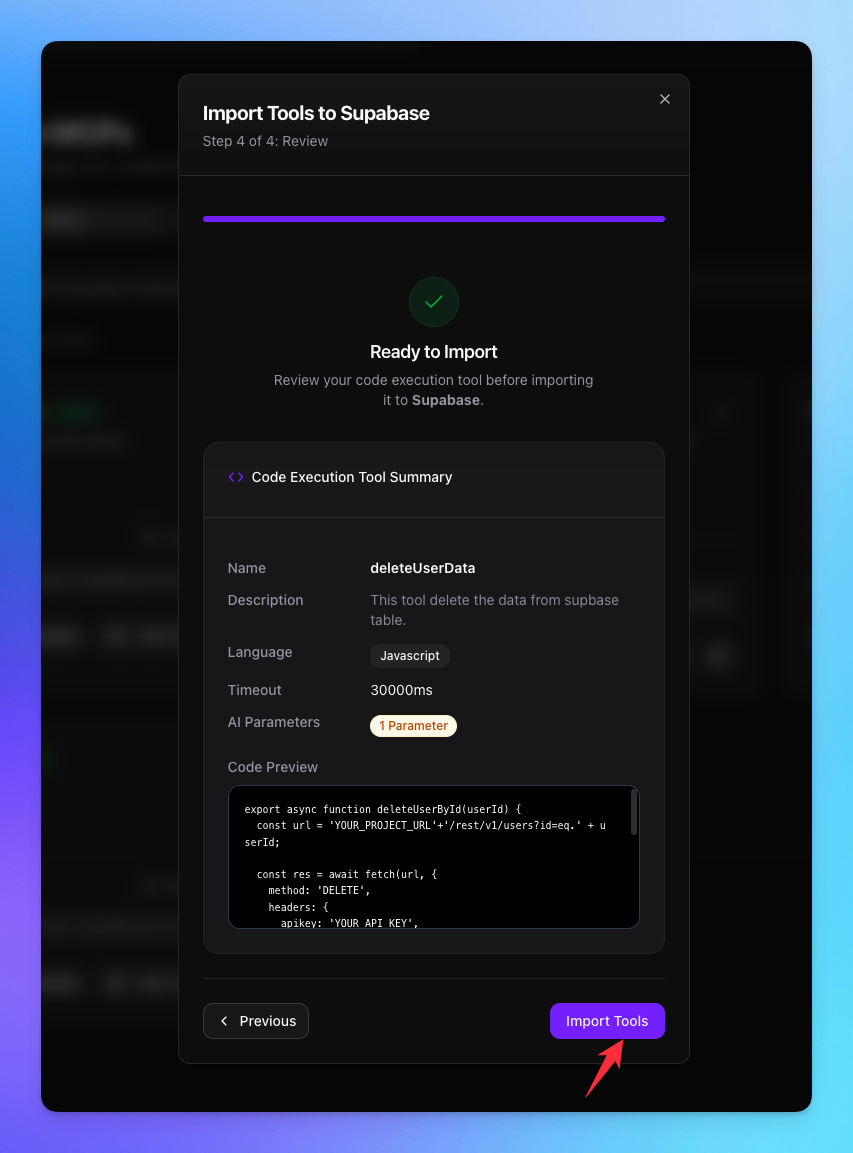
Added Tools
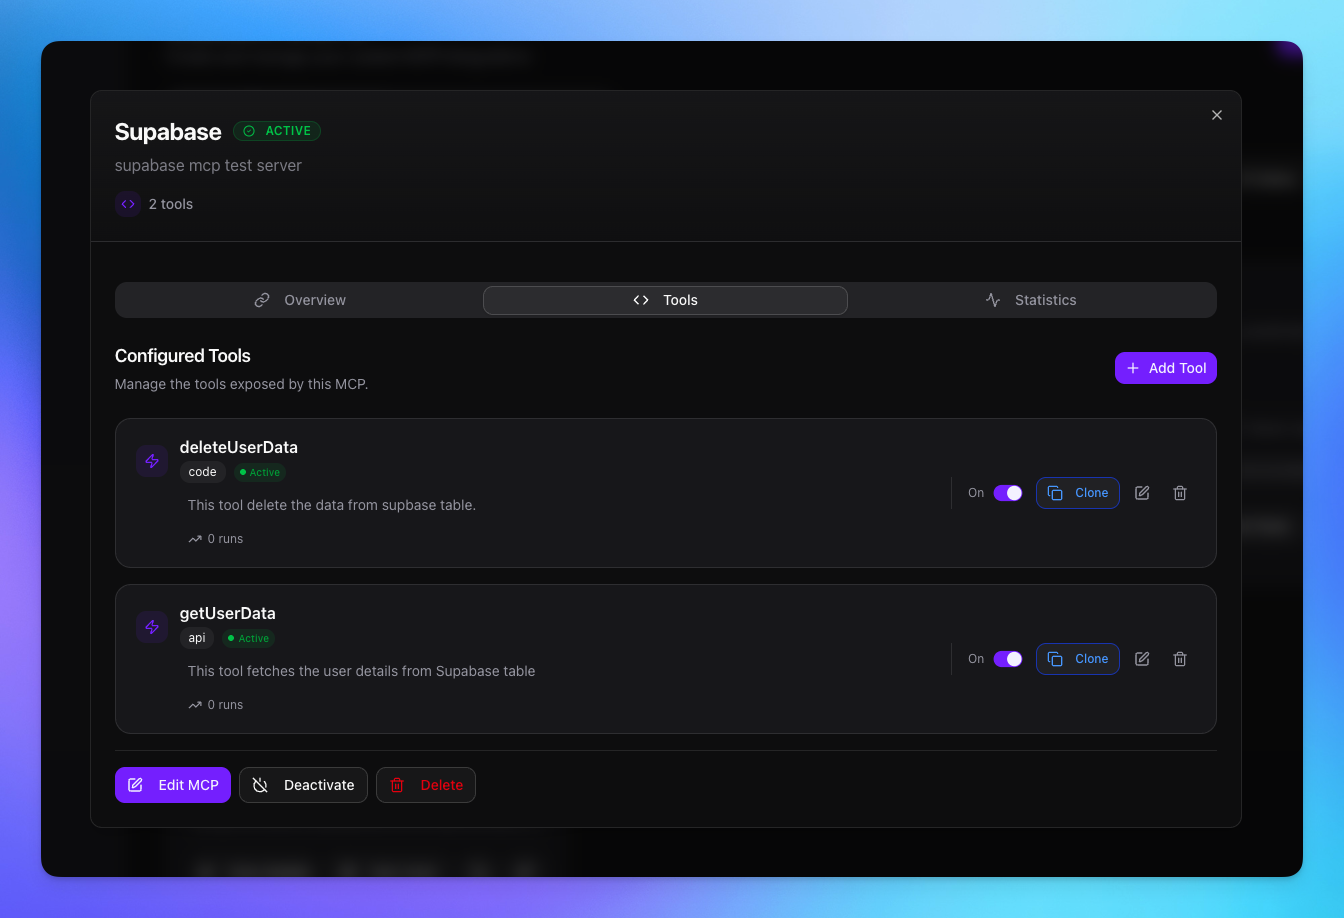
You’re all set! Your custom MCP and its tools are now configured in MCP360, with both API-based and code-execution types ready to use anywhere.
Related Articles
Connecting MCP360 with YourGPT
This guide explains how to integrate MCP360, our all-in-one MCP (Model Control Protocol) server, with the YourGPT.
Connecting MCP360 with ChatGPT
This guide explains how to integrate MCP360, our all-in-one MCP (Model Control Protocol) server, with the ChatGPT.
Connecting MCP360 with Flowise
This guide explains how to integrate MCP360, our all-in-one MCP (Model Control Protocol) server, with the Flowise.
Connecting MCP360 with N8N
This guide explains how to integrate MCP360, our all-in-one MCP (Model Control Protocol) server, with the N8N.
Connecting MCP360 with Agent Builder
This guide explains how to integrate MCP360, our all-in-one MCP (Model Control Protocol) server, with the Agent Builder.
Connecting MCP360 with Amazon Q
This guide explains how to integrate MCP360, our all-in-one MCP (Model Control Protocol) server, with the Amazon Q.