Account management in MCP360
This article explains how to manage your organization, members, billing, and project usage limits inside the MCP360 dashboard. Follow the sections below to fully control your account settings and resource allocation.
1. Accessing Your Account Settings
All account-level configuration starts from your profile menu.
Step 1: Log in
Sign in to your MCP360 dashboard using your registered credentials.
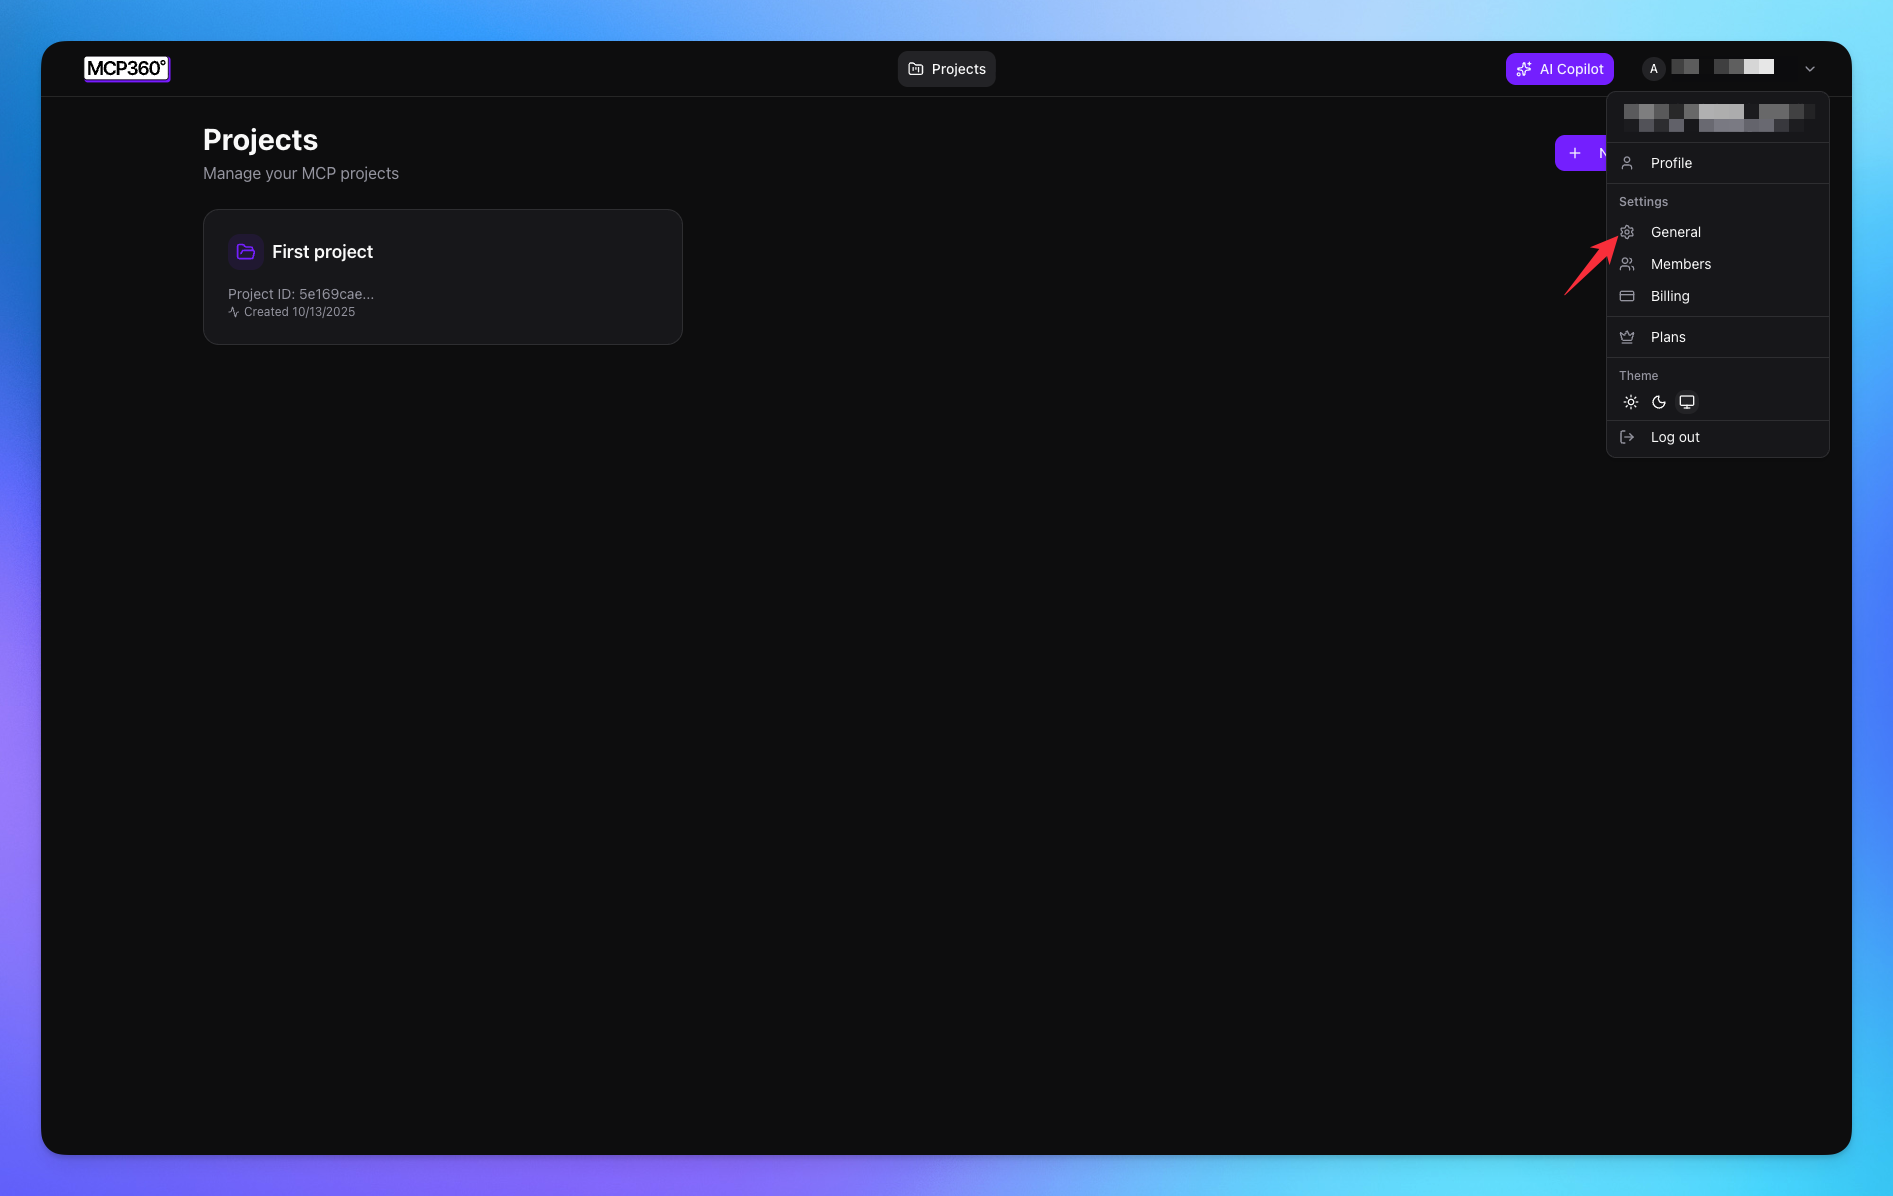
Step 2: Open Profile Menu
In the top-right corner of the dashboard, click on the Profile icon.
Step 3: Navigate to Settings
From the dropdown menu, select:
General
Members
Billing
Project Settings
These options allow you to manage your organization and projects.
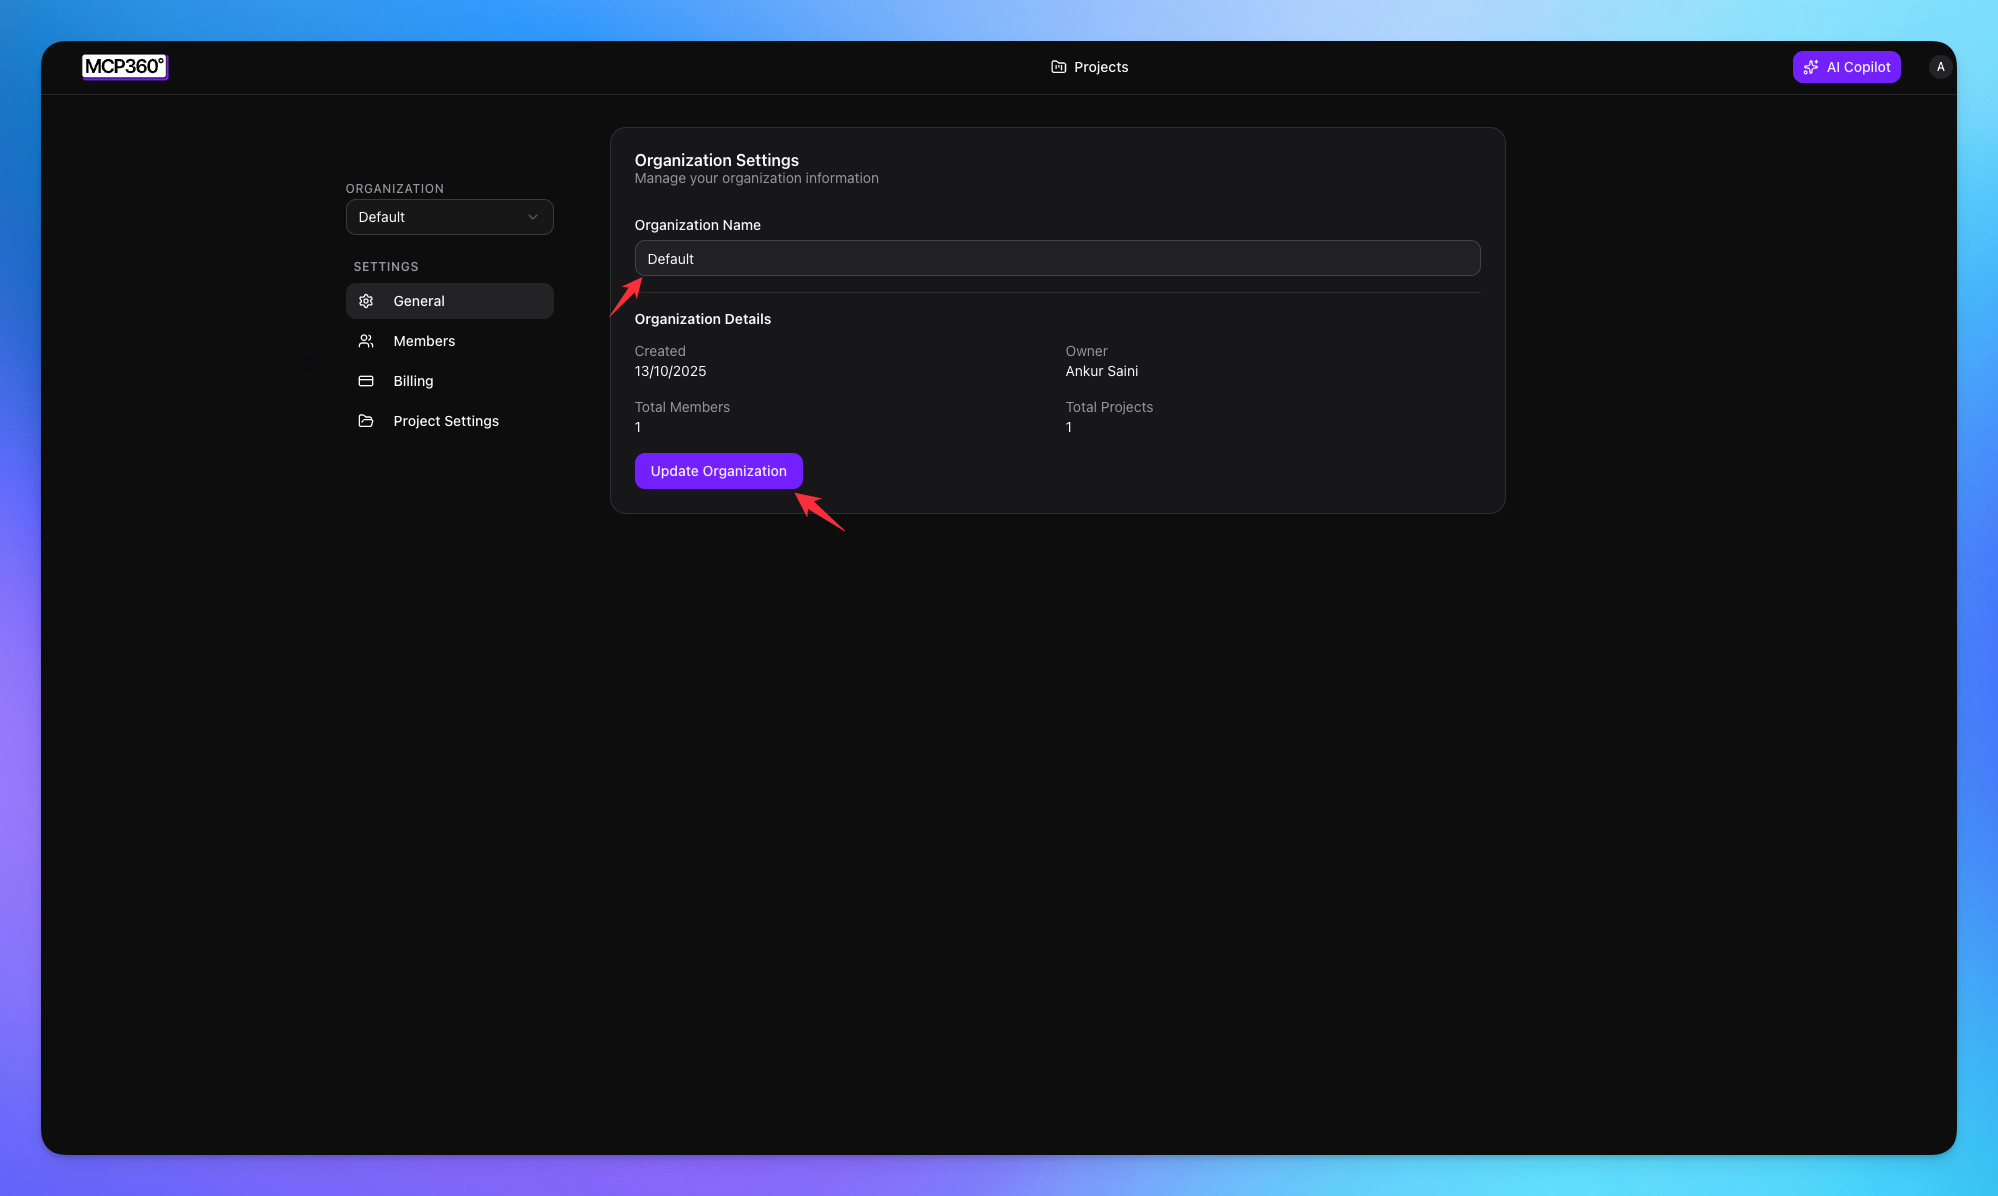
2. Update Organization Name
You can modify your organization name at any time.
Steps:
Go to General from the sidebar.
Under Organization Settings, locate the Organization Name field.
Update the name as needed.
Click Update Organization to save your changes.
Important Notes:
The organization name is visible to all members.
Changes apply instantly across all associated projects.
Only users with appropriate permissions can update organization details.
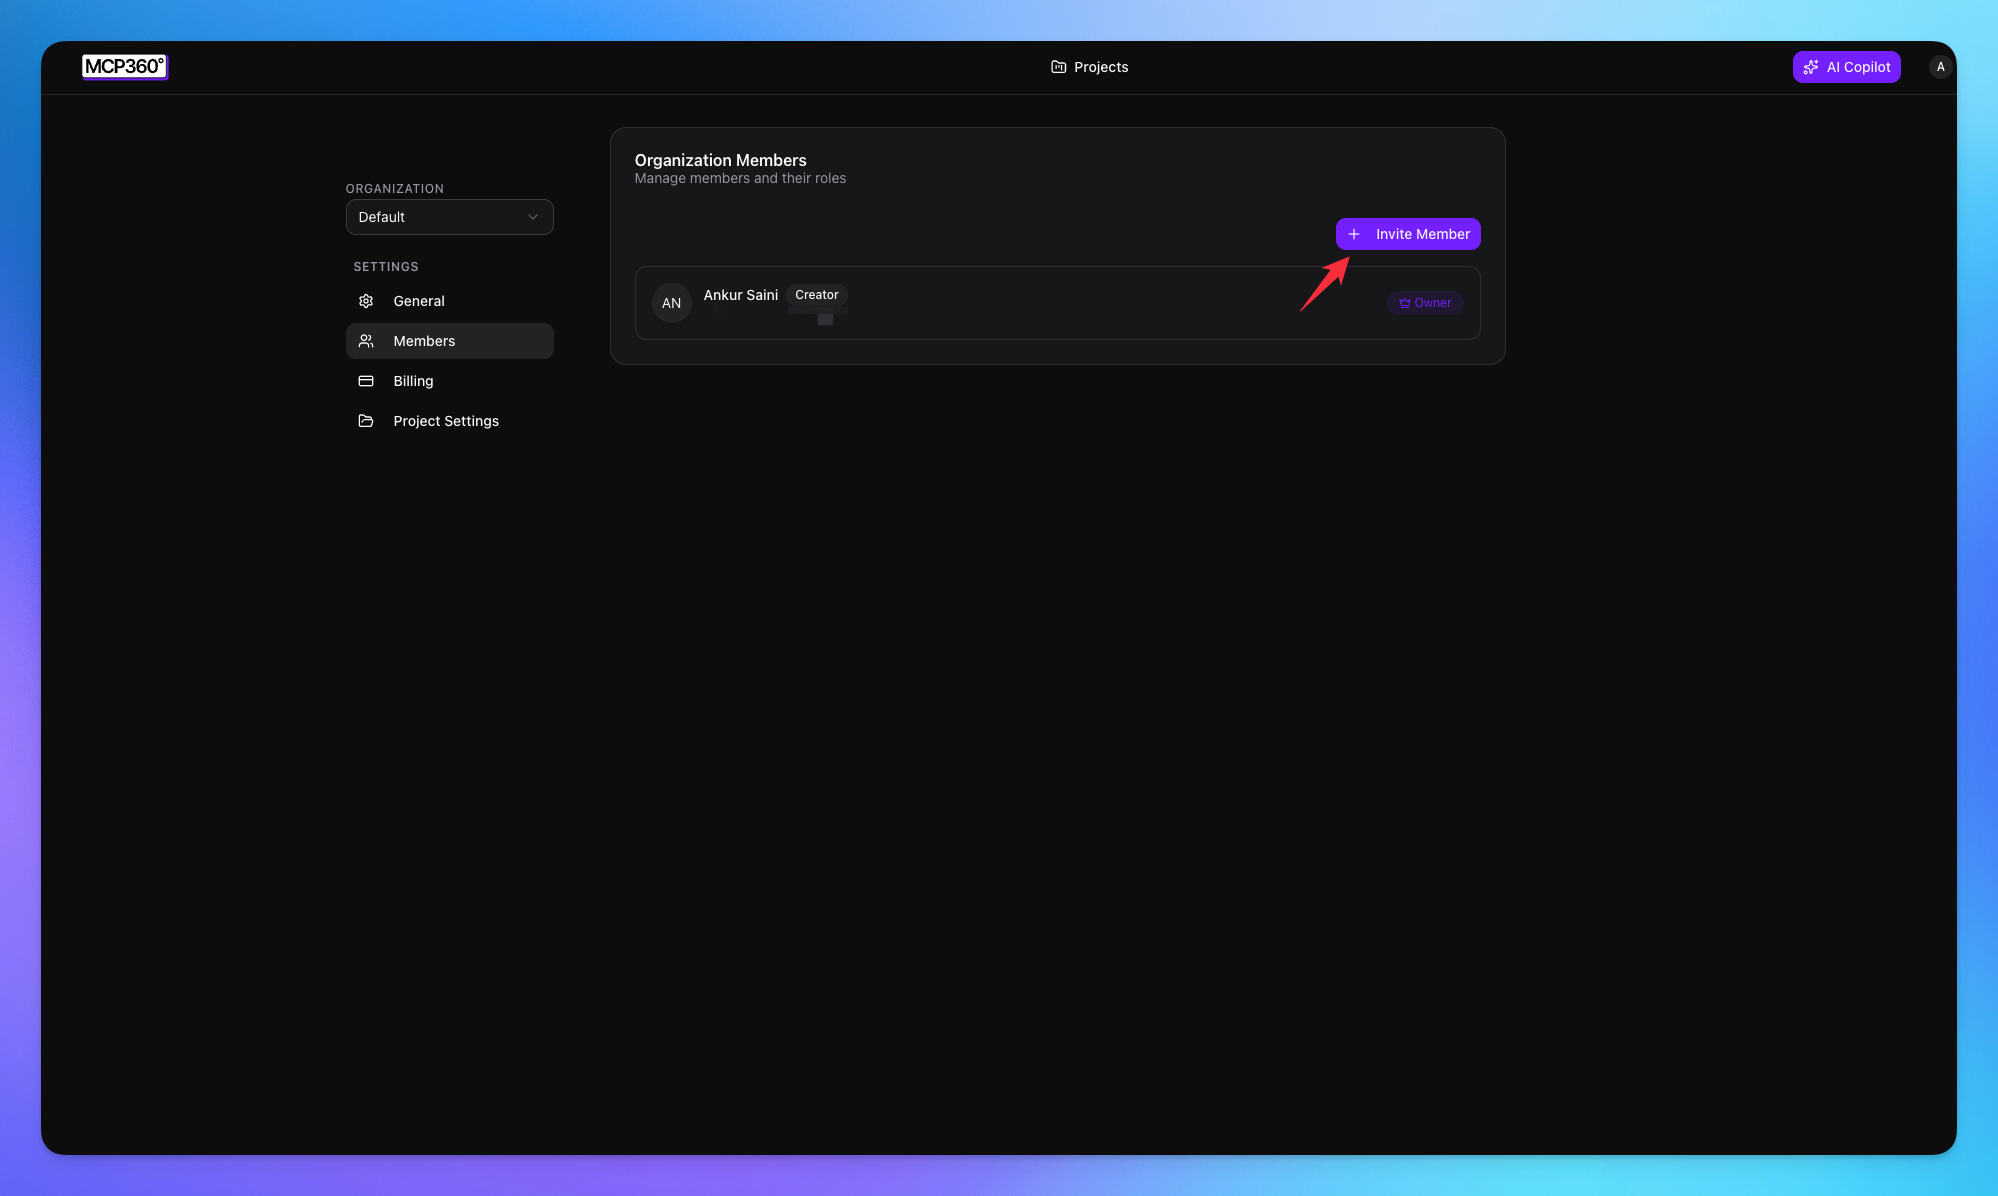
3. Manage Organization Members
The Members section allows you to invite users and assign roles.
View Existing Members
Click Members from the sidebar.
You will see:
Member name
Assigned role
Account status
This list displays all users currently part of your organization.
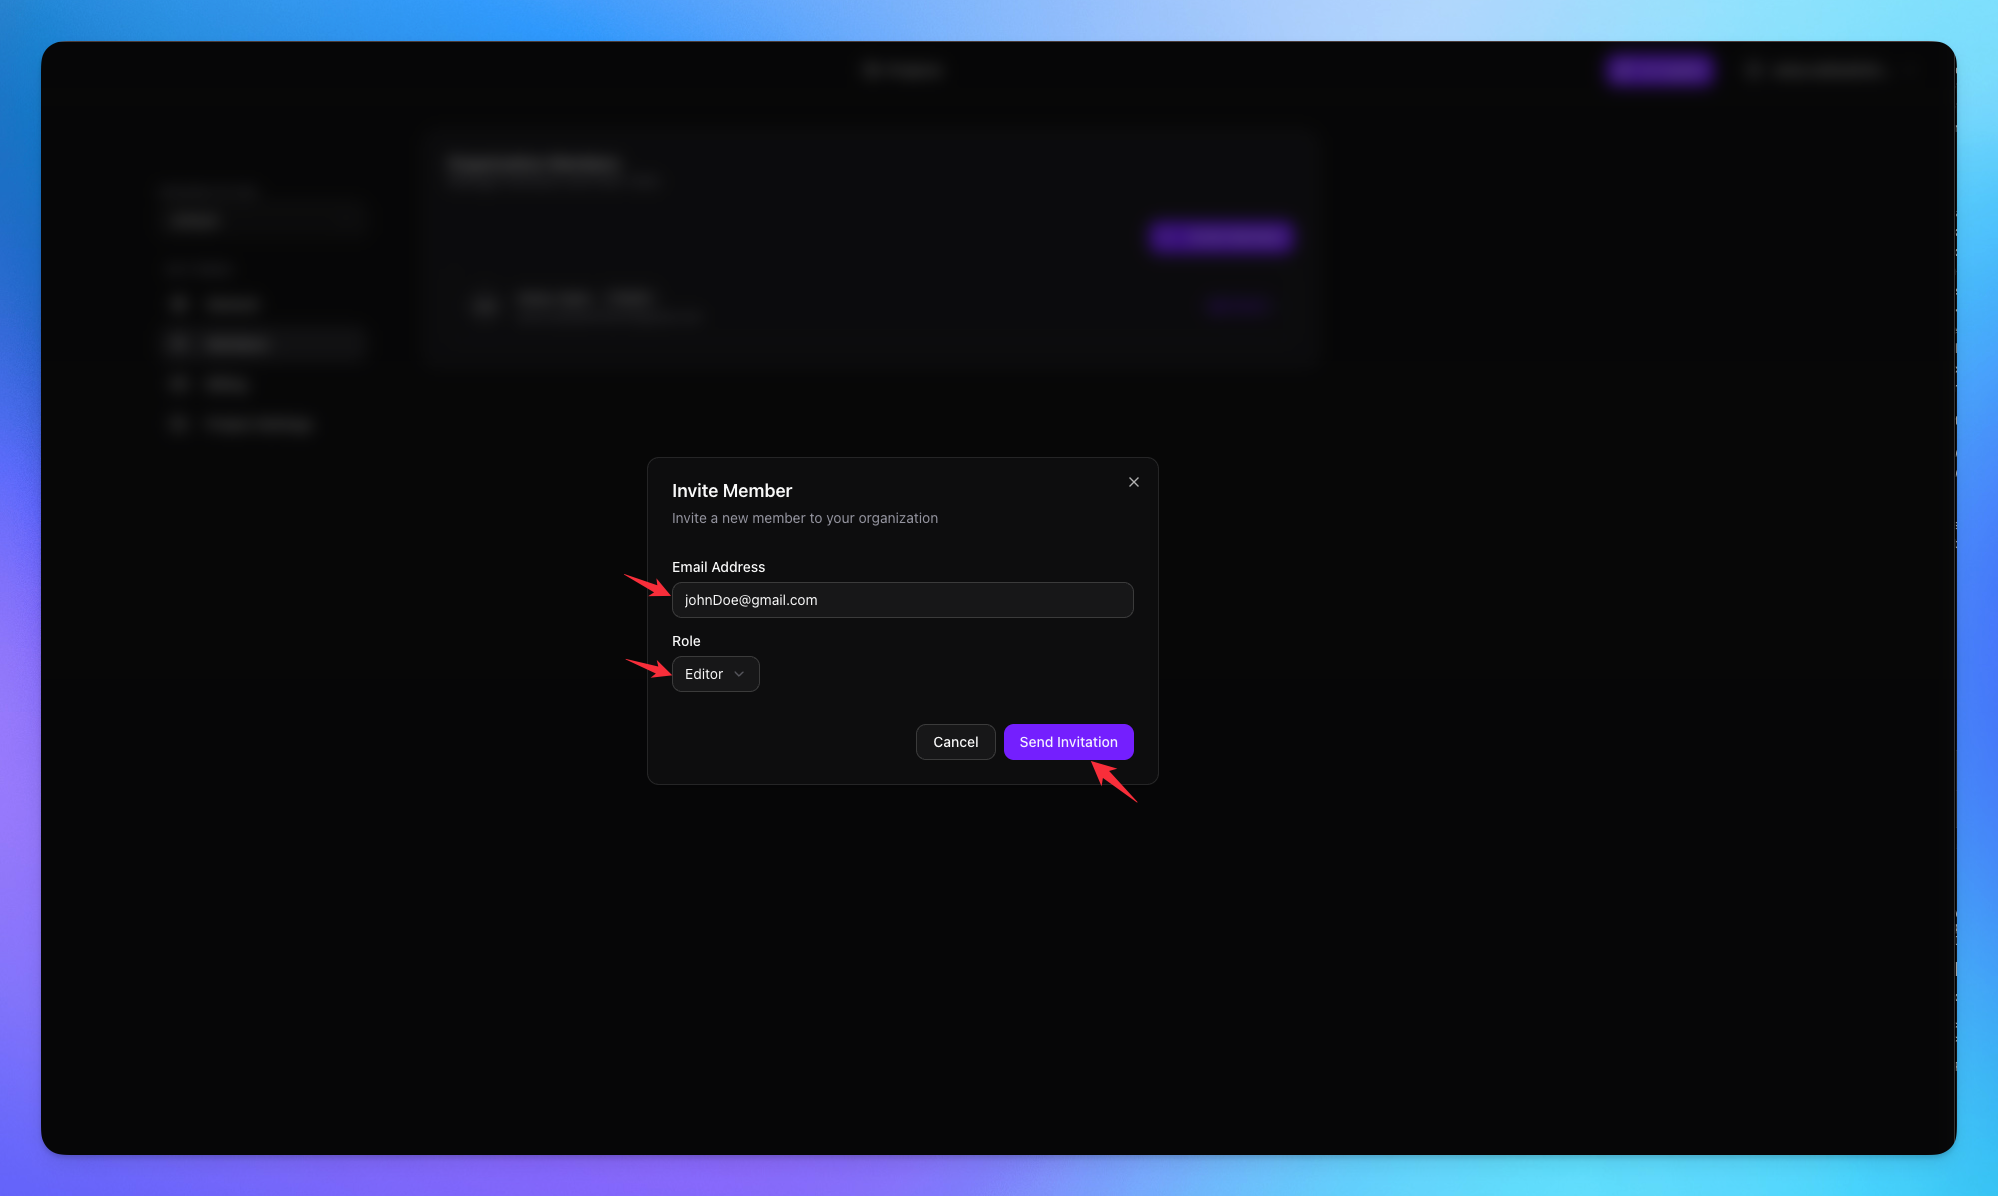
To add a user:
Navigate to Members.
Click Invite Member.
Enter the user’s email address.
Select the appropriate role.
Send the invitation.
The invited user will receive an email to join your organization.
Role Selection
Roles determine what actions a user can perform within the organization.
5. View Current Plan
Go to Billing.
Under Current Plan, you will see:
Plan name
Monthly cost
Plan status
Active badge
You can also see a breakdown of resource limits.
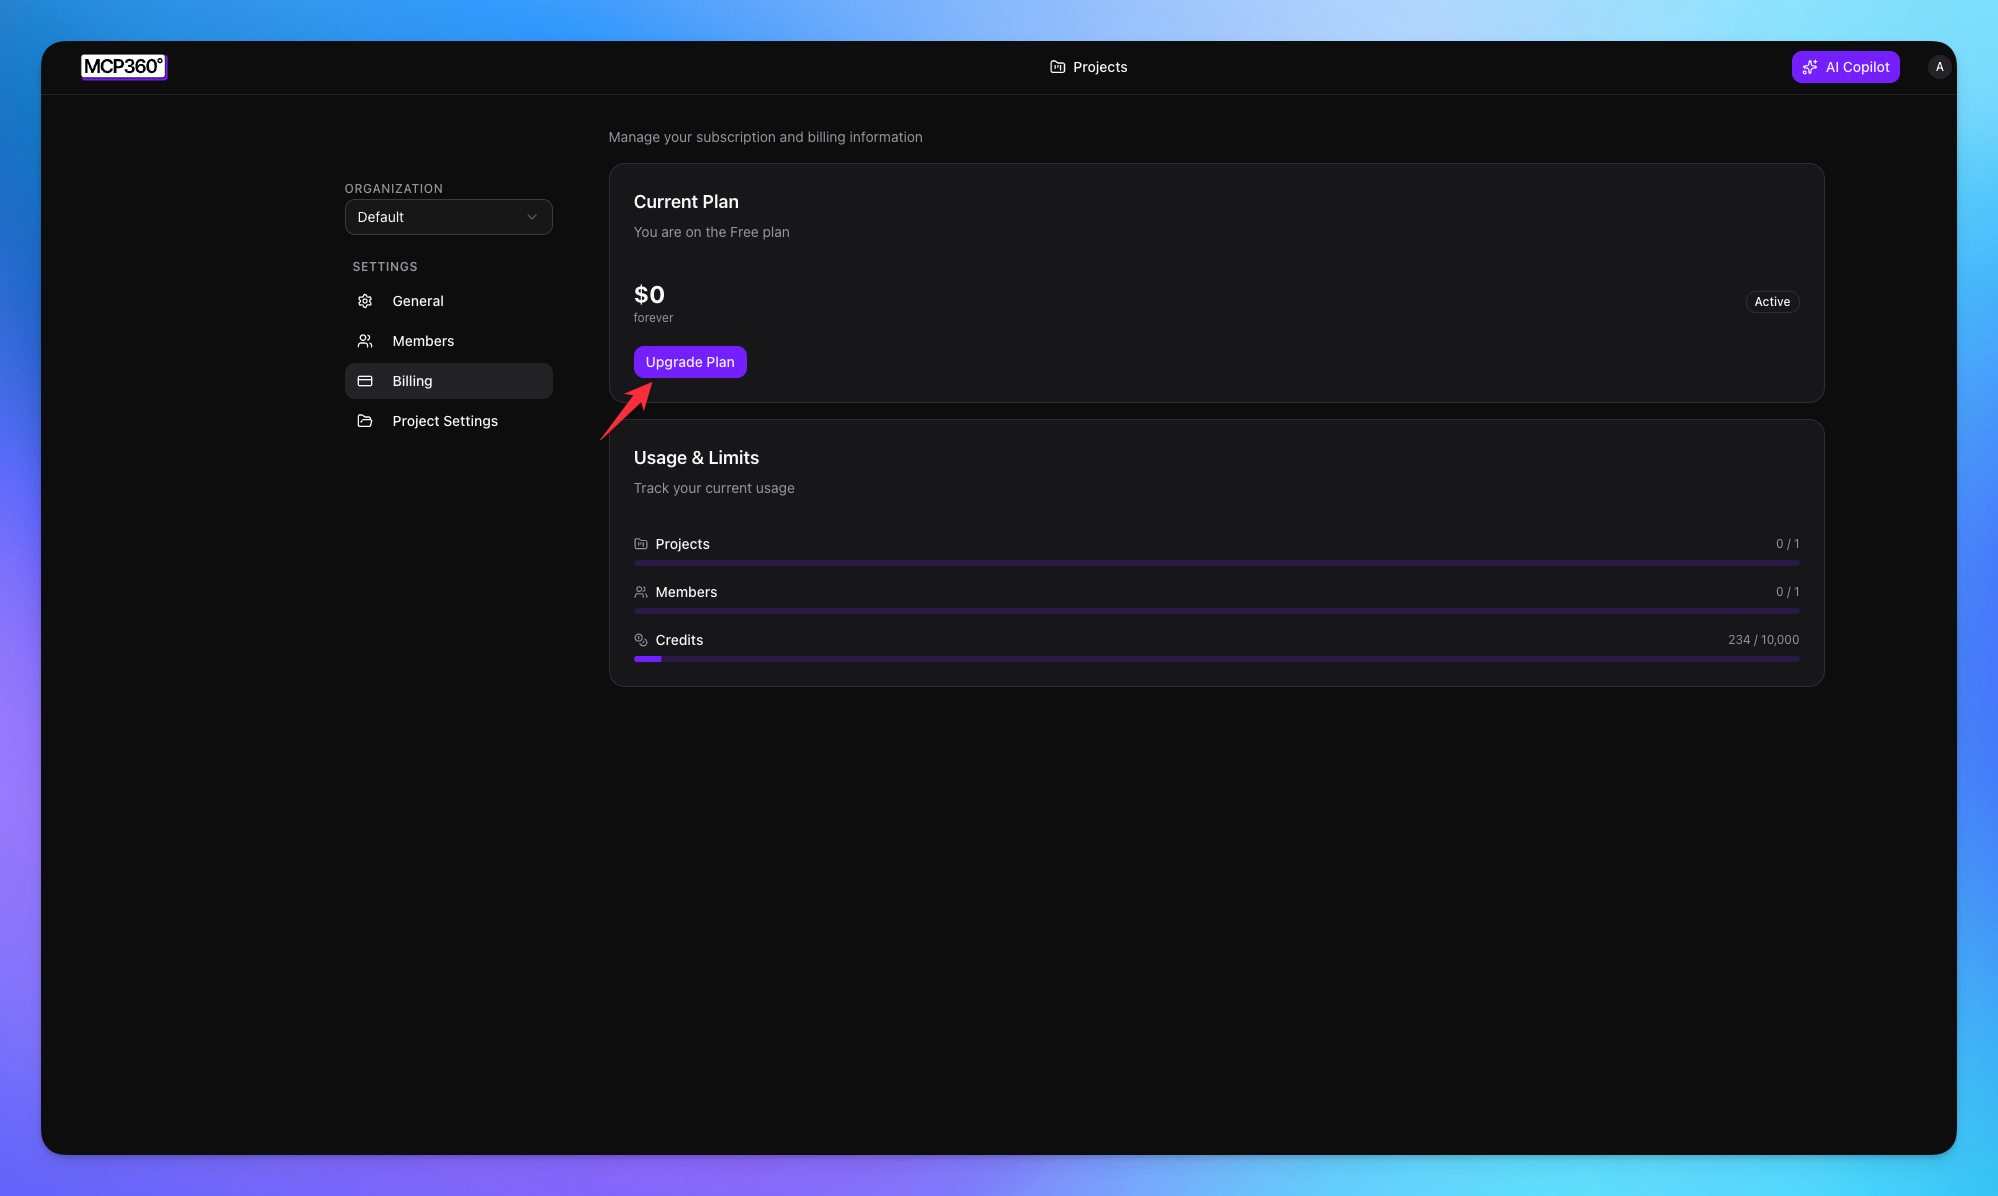
6. Monitor Usage and Limits
Inside the Billing page, review:
Projects usage
Members usage
Credit usage
This section helps you track how much of your allocated resources have been consumed.
7. Upgrade Your Plan
To upgrade:
Click Upgrade Plan.
Select the desired plan tier.
Complete the upgrade process.
Upgrading increases available limits and unlocks additional features.
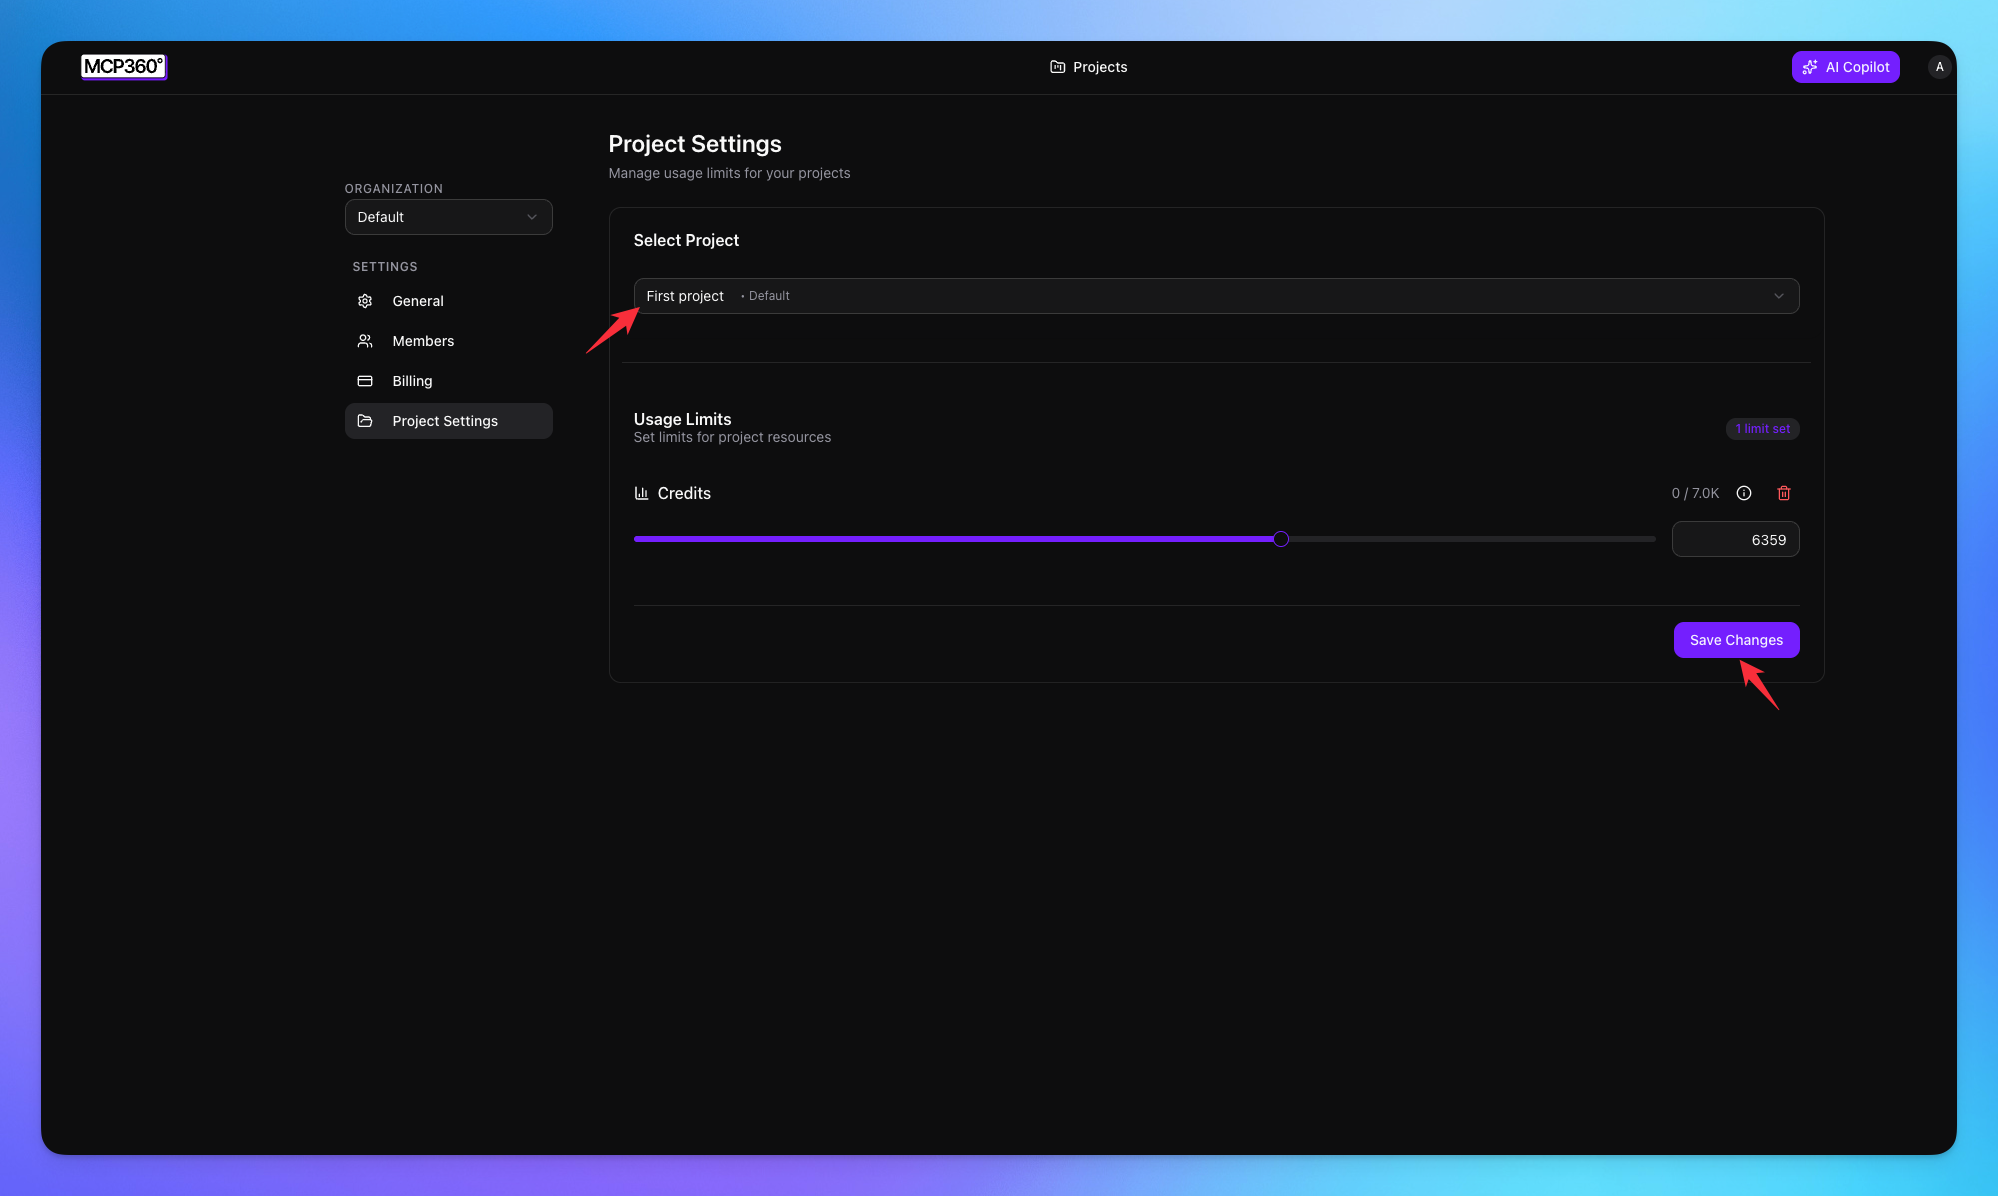
8. Manage Project Usage Limits
Each project can have its own resource limits.
Steps:
Go to Project Settings.
Use the Select Project dropdown to choose the project.
Under Usage Limits, select the limit type.
Adjust the credit limit using:
Slider
Manual value input
Click Save Changes.
Why Set Project Limits?
Project-level limits help you:
Prevent excessive credit consumption
Allocate budgets per team or workflow
Maintain operational control across multiple projects
Best Practices
To maintain operational efficiency:
Regularly review billing and usage.
Assign roles carefully.
Set project limits proactively.
Upgrade plans before reaching resource ceilings.
Periodically audit member access.
Troubleshooting
If you cannot:
Update organization settings
Invite members
Upgrade plan
Modify project limits
Check your assigned role permissions. If the issue persists, contact MCP360 support from your dashboard.